We endeavour to process all orders within 24 hours following order placement (excluding weekends and holidays). Upon dispatch of your order, you will receive a notification email with tracking details.
Standard delivery times
Main cities and towns5 business days
Returns policy
All orders come with a 30 day returns guarantee. We understand that sometimes, a product may not meet your expectations. That's why we offer a simple and straightforward process for returning items to our store. With our easy return policy, you can shop with confidence, knowing that if you're not completely satisfied, we've got you covered. Please start a live chat or give us a call to start your returns process.
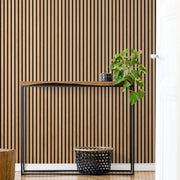
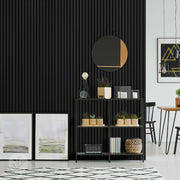
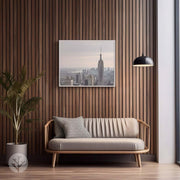
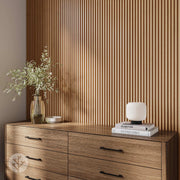
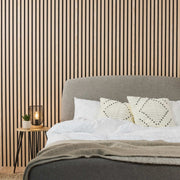
The essential guide to installing wooden wall panelling
Installation
13
min read
Wood wall panel installation guide
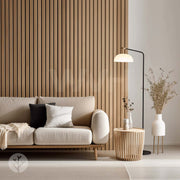
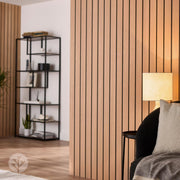
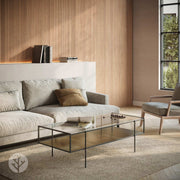
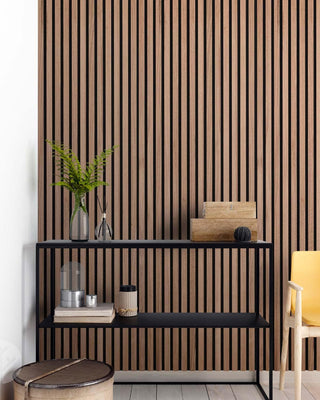
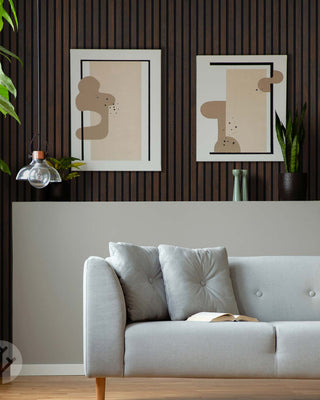
There’s no denying that wooden wall panelling looks eye-catching, whether on a wall or a ceiling. Unlike many luxurious interior products, which come with an expensive price tag or equally expensive fitting costs, wood wall panelling is easy to install, making it a relatively cost-effective way to transform a wall or room in your home!
Most of WVH®’s wall panelling ranges are so easy to install they can even be fitted by a DIY novice.
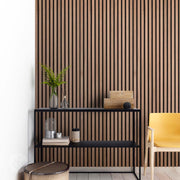
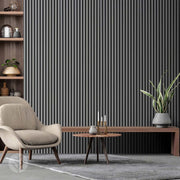
Best surfaces for wood wall panels
It may seem like wood wall panels can only be installed onto flat surfaces. However, the versatility of the product means they can be attached to almost any surface, including:
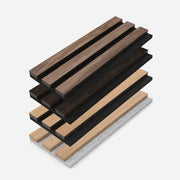
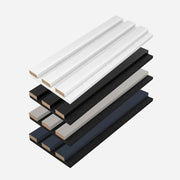
Wood panels
Brick
Tile
Drywall
Lath and plaster
Cement board
Plywood
It may seem like wood wall panels can only be installed onto flat surfaces. However, the versatility of the product means they can be attached to almost any surface.
Wood wall panels can be attached to the wall with either glue or screws, so the most important thing is to ensure that the underlying material is in good condition. Before starting any work, check that there isn’t any damaged plaster, loose tiles or similar. If there is, you must repair the surface to ensure the surface can accept the panels.
The installation process for wood wall panels is usually very straightforward, so you don’t have to spend much extra time, money and effort to get the desired look. Simply decide whether you will use glue or screws for the installation, and then you can get to work.
Whilst each of our ranges has its specific way of fitting, fundamentally, there are several pieces of equipment that you’re likely to need, including:
Tape measure
Pencil
Spirit level
‘No nails’ construction adhesive and adhesive gun (dependent on product)
Precision drill
Hammer and 2" finish nails OR air nail gun
Screwdriver and 2" finish screws
Electric saw or jigsaw
Before installing
It is essential that you leave the wood panelling in the format that it is supplied. Upon delivery, move it into the room that it is to be installed in, either strapped together or laid flat in loose sheets, so that the product can acclimatise to the temperature and humidity of the room before installation.
Installation
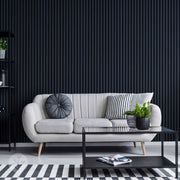
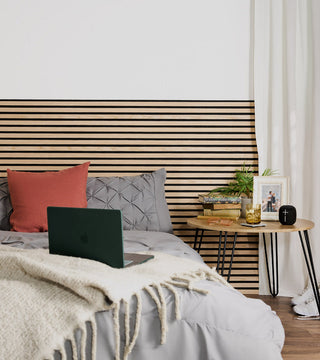
Regardless of the product range, the surface that you will be installing on must be relatively sound, dry, and dust-free. If you plan to fit the wall panelling in sections rather than over the entire wall, it’s always best to decorate first. Retrospective painting is possible, but it avoids getting paint onto the surface of the panels. Each panel of Acoustic Slat Wood Wall Panels are fitted butted up to the next, but its design, backing, and overall appearance disguise any joins between sections.
How to fit the panelling
Make a reference pencil line vertically or horizontally across the wall at eye level. If you are fitting batons to the walls’ surface prior to installation, either to give additional acoustic insulation to Acoustic Slat Wood Wall Panels® or simply to give the panelling a better base to be fixed to, this must be done first.
How to glue onto the wall
Glueing the panel to the wall is a straightforward procedure that only requires you to follow a few steps:
Step 1 Prep the wall - Remove any nails, trims and baseboards on the wall, ensuring nothing is damaged that you intend to reuse.
Step 2: Measure the wall - To calculate how many sheets you’ll need, measure the wall to get the correct dimensions. The first thing to do is to work out the square meterage by multiplying the wall width by the height while accounting for any doorways or windows. Divide the length of the wall by the width of the panel sheet to see how many panels you’ll need.
Step 3: Install the panels - Most walls are not completely straight, so make sure you check that the first panel is level by using a leveling tool. You can then decide which sheet will go where and trim any panels needed for doorways and windows. A fine-tooth saw blade is ideal for doing this part to avoid any spurs left behind when cutting.
Step 4: Glue to the wall - The best adhesive to use is either grab adhesive or construction glue. Before applying, check that all the openings align and the cuts have been made correctly. Using a caulk gun, apply the adhesive to the back of the sheet in a zigzag pattern. Carefully press the sheet into place on the wall. To further secure it, you can use a rubber mallet to tap the panel.
It is always best to finish an entire row or column before moving on to the next.
How to screw into the wall
There are four steps involved in screwing wood panels to the wall:
Step 1: Prepare the wall - To ensure the wood panels are flat against the wall and not uneven due to inconsistencies on the surface, it needs to be fully prepared. This requires you to sand away any coarse impurities on the wall and also remove any nails or screws that may already be in place.
Step 2: Mount the foundation panels (Required for acoustic panels only) - If you are installing acoustic panels, battens need to be mounted onto the wall so you can drill screws through the panels, ensuring they are securely held in place. Screws and wall plugs may be needed, depending on the type of wall you are fixing them to. To achieve maximum acoustic results from our acoustic panels, the acoustic insulation material wall can be inserted between the battens to help achieve the best possible sound-dampening levels.
Step 3: Cutting the panel length - The panels will be supplied at a certain length that may not be suited to the height of your wall. This means you may have to make some adjustments by cutting them with a saw. You can do this by taking a pencil and marking a cut line with a pencil before carefully cutting along the line.
Step 4: Mount the panels - You can now take the appropriate length screws and drill them through the panels onto the battens (for acoustic panels). If you are not installing acoustic panels, you can simply screw the screws supplied with the product directly onto the wall.
How to screw into timber batons - To screw wood panelling into timber battens is similar to screwing directly into the wall, although with one or two differences.
How to screw into the wall
There are 4 steps involved in screwing wood panels to the wall:
Step 1: Prepare the wall - Sand away any inconsistencies on the battens so they can accept the panels. This includes removing any screws or nails that may already be in place.
Step 2: Drill the screw holes - For the batten to accept the screw through the panel with ease, you will need to drill the right-sized screw holes into the battens before the panels are mounted. Do this by measuring the panel you are mounting and marking the drill point, then measuring the batten and placing the same marking position to ensure the two holes will align with each other to accept the screws.
Step 3: Secure the panels onto the wall - Drill the marked points into the panels (you shouldn’t need more than 2 or 3 to secure them in place). Once this is done, insert the wall plugs (if needed) and ask someone else to hold the panel in place so the hole on the panel is aligned with the hole on the batten. You can then take the appropriate length screws to screw them through both holes to secure the panel.
Step 4 mount the panels - You can now take the appropriate length screws and drill them through the panels onto the battens (for acoustic panels). If you are not installing acoustic panels, you can simply screw the screws supplied with the product directly onto the wall.
How to screw into timber batons
To screw wood panelling into timber battens the procedure is similar to screwing directly into the wall, although with one or two differences.
Step 1 prepare the wall - Sand away any inconsistencies on the battens so they are able to accept the panels. This includes removing any screws or nails that may already be in place.
Step 2 drill the screw holes - For the batten to accept the screw through the panel with ease, you will need to drill the right sized screw holes into the battens before the panels are mounted. Do this by measuring the panel you are mounting and marking the drill point, then measuring the batten and placing the same marking position to ensure the two holes will be in line with each other to accept the screws.
Step 3 secure the panels to the wall - Drill the marked points into the panels (you shouldn’t need more than 2 or 3 to secure them in place). Once this is done, insert the wall plugs (if needed) and ask someone else to hold the panel in place so the hole on the panel is aligned with hole on the batten. You can then take the appropriate length screws to screw them through both holes to secure the panel.
How to cut wood wall panels
How you cut wood wall panels will depend on the tool you use to trim the lengths. There are a few different options that work well, which we go into more detail about below:
Circular saw
A circular saw is a good option to rough cut through several panels. Ensure a fine-tooth blade is installed on the saw before you begin. Then, lay 2-by-4 pieces of lumber parallel on the floor about 3 feet apart. Stack the panelling face down onto the wood you’ve put on the floor. Check that your measurements are correct, and create a cutting guide by laying a guide board on top of the panelling. Then, clamp the guide on both ends to ensure the guide and panelling remain in place. Take the circular saw and run it along the guide so you produce a straight, even cut.
Handsaw
If you need to cut out the opening for an electrical outlet or light switch or are making shortcuts, a handsaw that cuts on the down stroke is probably your best bet. Place the panelling across a pair of sawhorses facing upwards and check that your measurements are correct. Then, you can start to cut slowly, but firmly so you avoid splintering the wood.
Saber saw
Saber saws that have a fine-tooth blade installed are perfect for detail work and precision cutting. While the cutting is done quickly, you have to be careful as saber saws can be difficult to keep in a straight line when you are freehanding. Use chalk to create a cutting line before clamping two guide boards to the panelling, so you should then have enough room to cut through without any issues.
How to install wall panels around plugs, windows and fixtures
Installing wood wall panels around plugs, windows, and fixtures can be tricky, as you must ensure the cut-out is accurately measured to fit flush with the feature. When it comes to plug outlets and fixtures, do the following:
Chalk around the space on the wall
Press the loose panel up against it so you create a clear outline of the area you want to cut
Drill holes in the corners and use a saw to make the required cuts
You may want to extend the cut by around 1.9 cm round just to be sure it fits
Windows and doors require a slightly different approach. Instead of chalking, you need to:
Measure the area around the window or door
Mark out the same measurements on the panel before creating the cutout
As before, extend the cuts 1.9 cm beyond the required space so you can be sure it slots into place
When you are cutting the panels, use either a saber saw from the backside or a handsaw from the finished side to avoid finishing with rough edges on the faces of the panels.
If you have any irregular corners you need to accommodate, you can also use a pencil compass to scribe the required shape on the panel before using a coping saw to get the perfect finish.
To allow for minimal expansion, it’s prudent to leave a small gap of approximately 1.58 mm. Light switches and electrical sockets are easily fitted by simply removing the faceplate, marking the recessed socket position and then cutting out using a jigsaw.
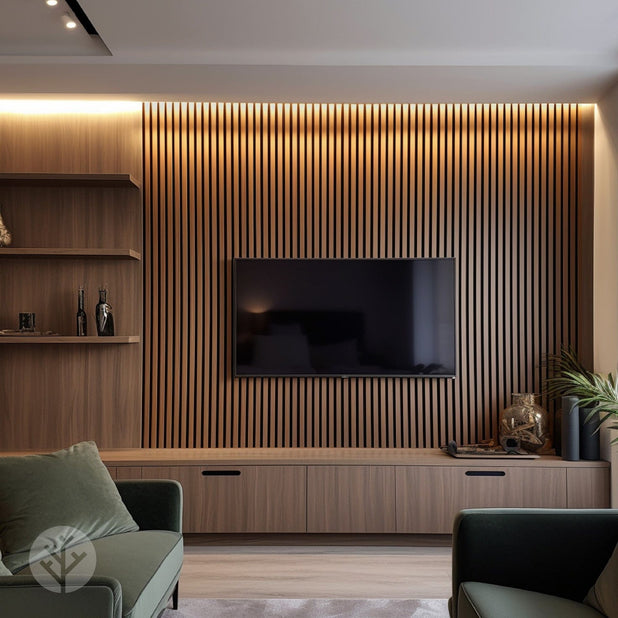
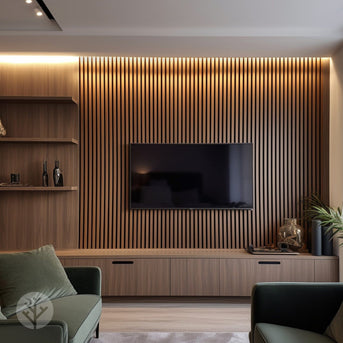
How to hide wires
One of the biggest issues you’ll face when installing a new TV is how to create a seamless look that isn’t spoiled by dangling wires. The best option here is to create a hole in the wall behind the wall-mounted TV or position on a cabinet or media unit. There are a couple of ways you can do this, with the first being a light wood frame behind the TV. This is quite simple to do:
Cut the frame down to the appropriate size.
Cover it with your chosen paint or wallpaper, and then cut a hole in it for the TV mount.
If the frame is light enough, you can use adhesive strips or picture hangers to hang it on the wall.
Then, attach the TV to the mount and hide the wires behind the frame.
You can go one step further and hide the wires inside the wall, although this requires more work. For stud walls:
Cut a hole in the wall behind the TV and another one lower down in the wall where the cables will exit
Tape the cables to something you can feed behind the plasterboard and pull them out the bottom
Use a socket box at both ends, so you have a smoother finish
If you hit a stud, you’ll need to cut out another hole in the wall, along with a hole through the stud, before filling the mid-way hole when finished. It may be best to use a stud finder before you start any work to ensure you know what to expect
Any of the entrance and exit holes on the stud wall will have to be replicated on the wood panelling before the panels are stuck in place so you can feed the wires through
Brick walls require a lot more work, but it does create a seamless finish:
Use a hammer and chisel to chase away the plaster and brickwork
To protect the wall and wires, add a length of trunking onto the chasing
Then replaster and redecorate until the wall is back to normal and you can no longer see the wires
Opening a brick wall is more likely a job for a professional electrician, as they will know where to chisel and place the wires inside the wall. While it will be cheaper to do it yourself, unless you have the right level of experience, you could cause unnecessary damage that needs to be repaired.
Expert guidance
Are you looking for premium wall panelling that seamlessly blends sophistication with durability and value for money? Look no further; with over 40 years of experience supplying luxury wood products and our wood wall panels are available in numerous colours and styles, so you can achieve the look you always wanted for your home.